Guide: Your website, start to finish · Chapter 8 of 9, Booking from your website
Booking from your website: booking over your page, seats left, your brand and reviews
How customers book without leaving your website, showing seats left, your brand on booking pages, your reviews, and your site on a phone.
Booking is built into your website. Customers book without leaving your page, can see how many seats are left if you want, and see your brand all the way through.
Customers book full screen, without leaving your page
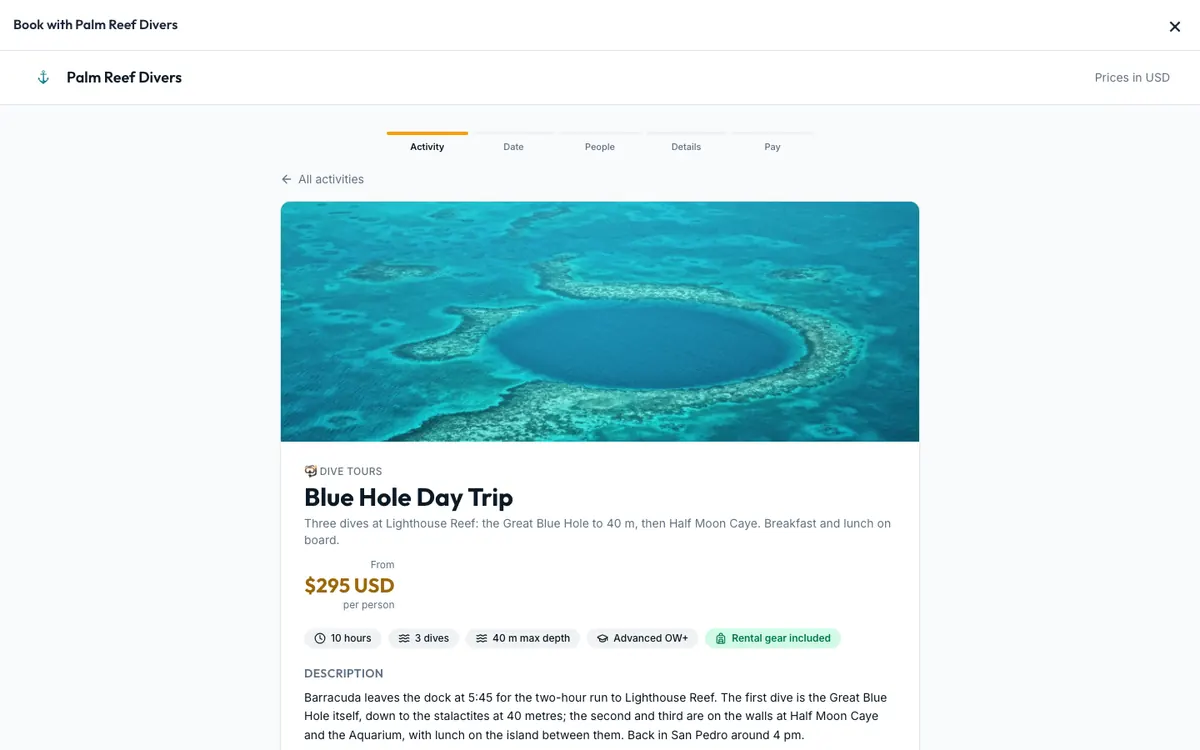
Every Book button on your site opens booking full screen over the page: in the header, the hero, activity cards, upcoming trips and the trip calendar.
- The steps are Activity, Date, People, Details and Pay. By activity and By date switch how customers choose.
- Book Now on an activity page opens booking straight at that activity.
- The close button, Esc or the phone's Back button returns customers to your page.
- Paying by card still opens the bank's page on its own.
Show how many seats are left
One setting covers your booking page, trip calendar, check-in page and website. Your team always sees the real number.
- Go to Settings → Booking rules → Seats left.
- Choose Always, Only when few are left or Never. Your choice saves at once.
- With Only when few are left, type how few under Show it at, then press Save on the Unsaved changes bar.
- Preview shows your next trips as your website shows them.
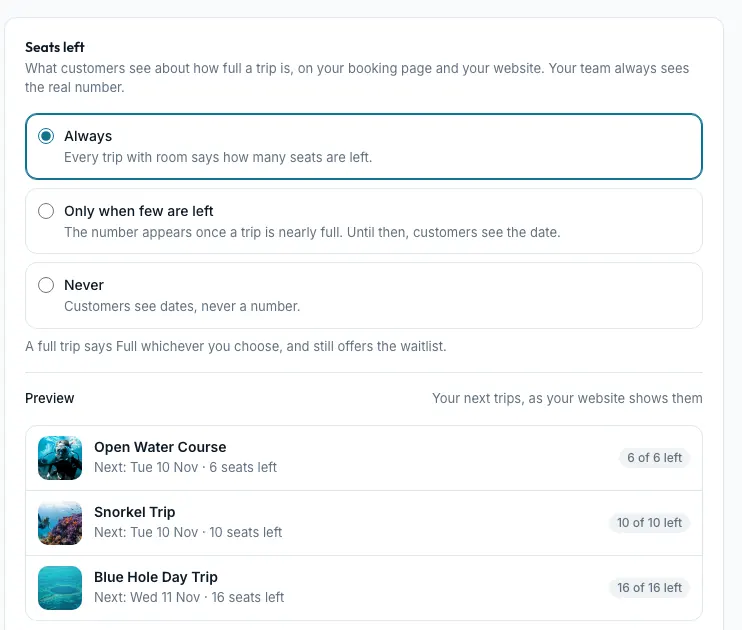
On your website, seats left show on Upcoming departures and on each activity card's next date. A full trip always says Full and still offers the waitlist. See Seats left.
Your brand on your booking pages
Your booking page, trip calendar and booking popup wear your brand: your logo, your colours, your corners and, if you want, your fonts. These changes go live when you publish your website.
- Go to Settings → Booking page and embed and find the Look card.
- Your logo and colours come from Brand. Press Change in Brand to change them.
- Turn on Use my brand fonts for headings and activity descriptions. Prices, dates and buttons keep Seascape's font, so every amount reads the same.
- Under Top of the page, choose Logo and name, Logo only or Name only.
- Header photo is the booking page's own photo. It never changes your website.
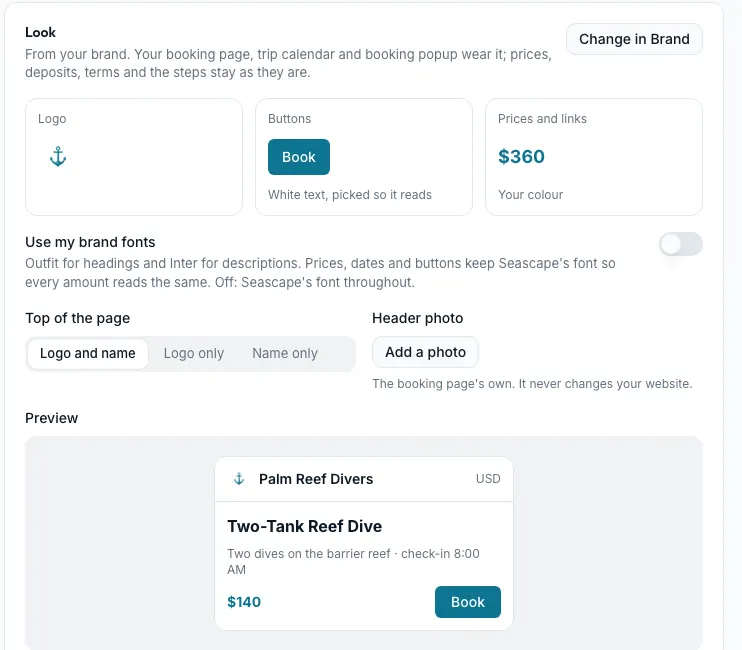
Buttons are your brand's button colour, with white or dark writing, whichever reads. Prices and links are your main colour, or a darker shade of it where it would be too light to read.
Pay, waiver and check-in pages show only your logo and your name, with one button in your colour, so paying and signing always look the same. Settings → Customer pages lists every page your customers open and how much of your brand each shows: see Customer pages.
Show your reviews on your website
The Reviews section can show the reviews customers left after their trips, newest first, with first names and stars.
- In the editor, add or select a Reviews section.
- Set Where they come from to My published reviews.
- Choose How many to show, and Only show at least a number of stars.
A reviewer's surname, email and booking never reach your site. Hide a review under Reviews in the sidebar and it leaves your site. See Reviews.
Your website on a phone
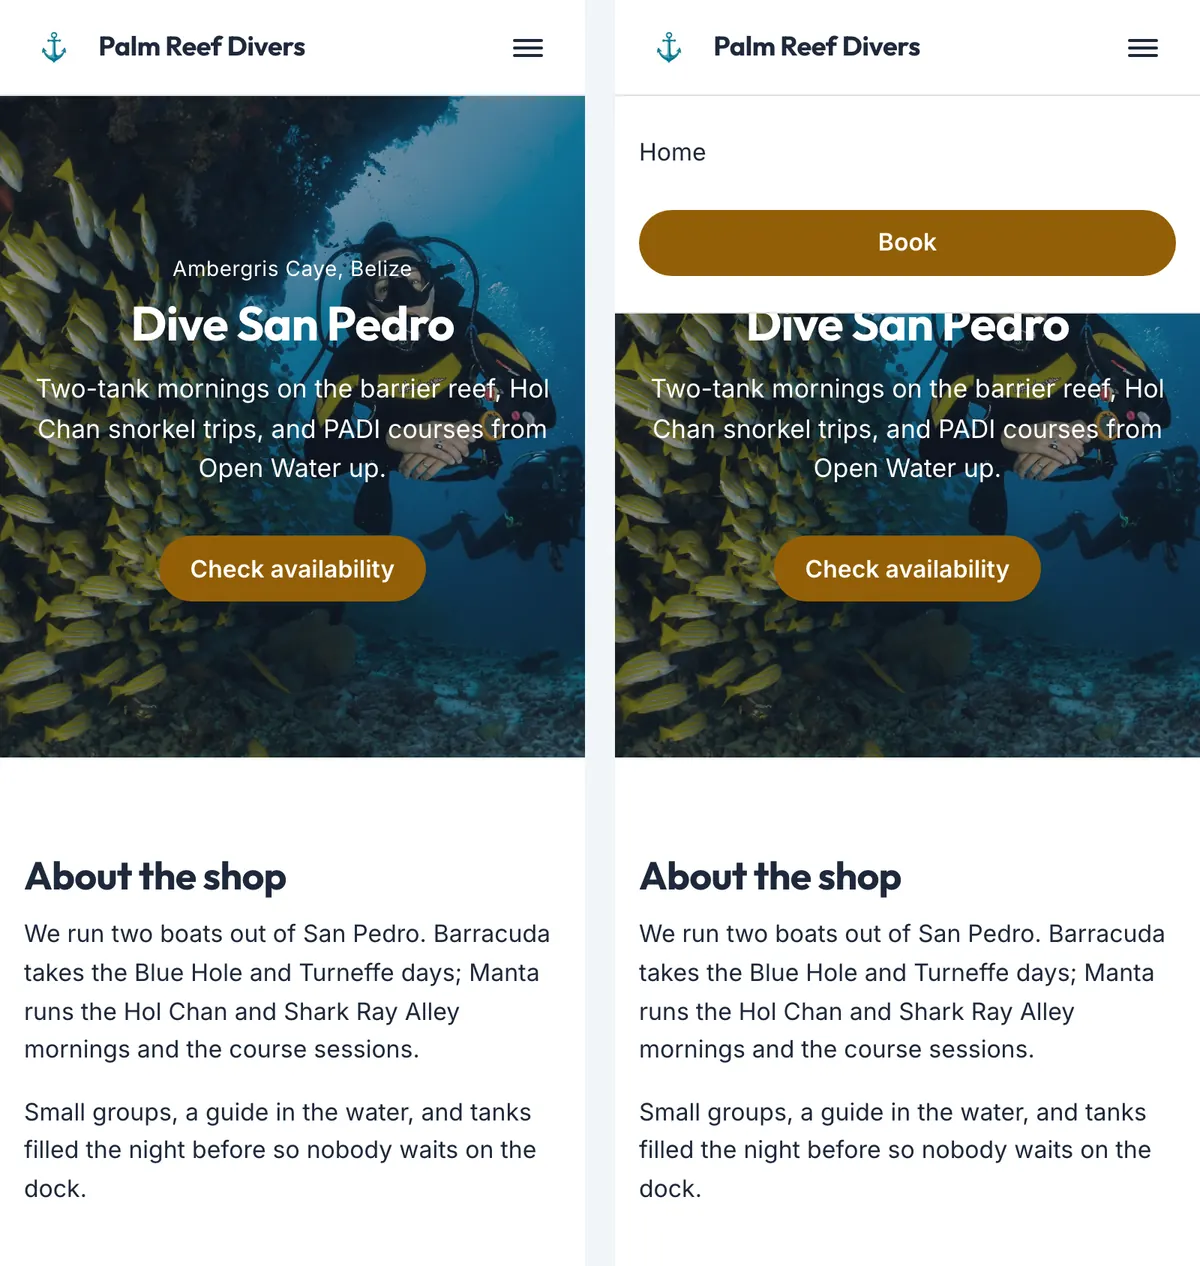
On a phone, your menu folds into a button at the top right. It opens your pages and a big Book button. To show your pages in a row instead, select the Header in the editor and change On a phone.
Still stuck?
Signed in, it can also look at your own shop.
A person reads every one: support@seascape.bz